Tired of your once-pristine white sneakers looking like they’ve been through a war zone? Mike here, and after 10+ years of testing footwear and gear, I’ve tried every cleaning hack in the book. When the Wilkins Sneaker Whitener promised to bring back that “fresh out the box” white with just a few coats, I was skeptical but curious. So I spent 6 weeks putting this stuff through every test I could imagine – from my beat-up 5-year-old Air Force 1s to canvas Vans to leather tennis shoes. If you’re tired of products that promise miracles but deliver disappointment, this honest review might save you some serious frustration (and money).

Product Specifications
- 💰 Price: $15 (check latest price on Amazon)
- 📏 Volume: 2.53 fl oz (75ml)
- 🧪 Product type: White pigment paint/polish hybrid
- 👟 Works on: Canvas, leather, foam, rubber soles
- 🔧 Application: Built-in sponge applicator
- 💧 Finish: Water resistant when dry
- 🎯 Best for: Leather and vinyl sneakers (Air Force 1s, leather tennis shoes)
- ⚠️ Limitations: Canvas shoes (can look blotchy)
- ⏱️ Testing period: 6 weeks, 8 different shoe types, 15+ applications
What Is Sneaker Whitener Actually – And How Does It Work?
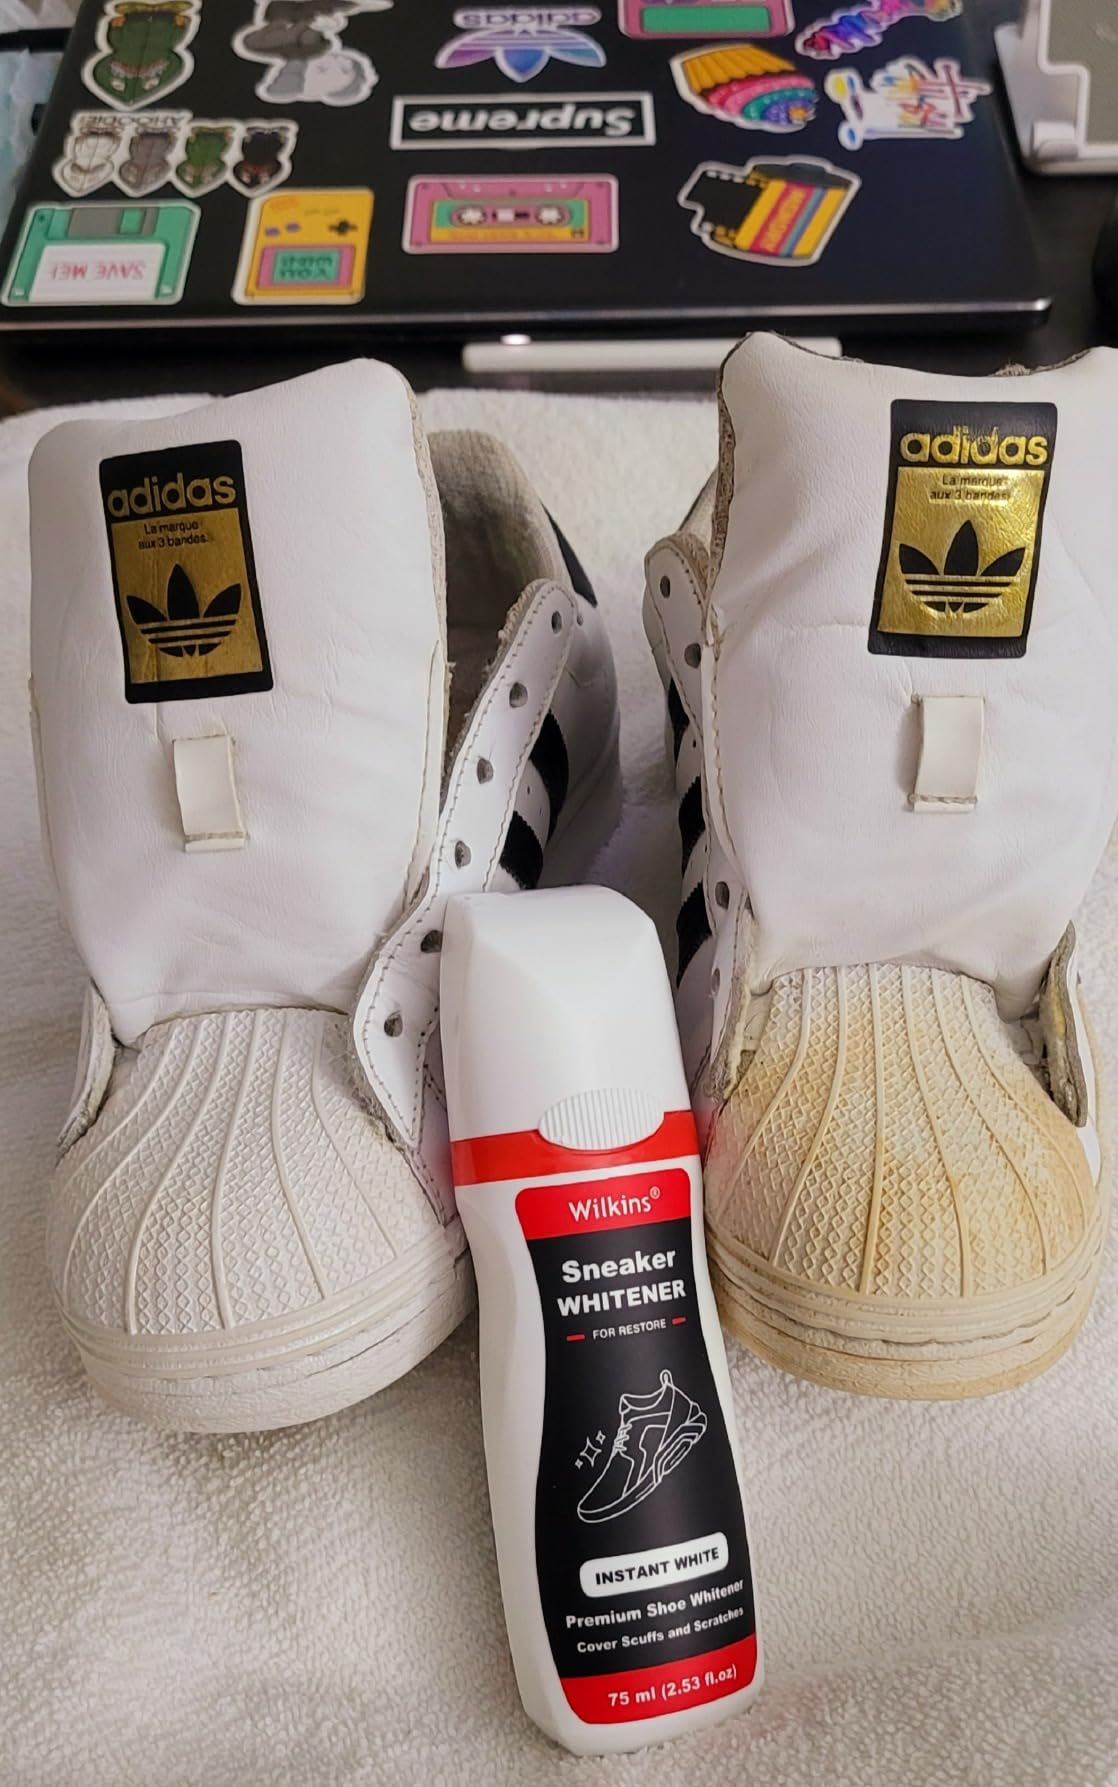
Let’s be clear about what this product actually is – it’s essentially white paint designed specifically for shoes. The Wilkins Sneaker Whitener isn’t a cleaner that removes dirt; it’s a pigmented coating that covers stains, scuffs, and yellowing with a fresh layer of white.
The bottle holds 2.53 fl oz of white liquid with a consistency somewhere between paint and polish. The built-in sponge applicator on top is designed to control the flow and help distribute the product evenly. In theory, you shake it up, turn it upside down, press the sponge against a hard surface until the white liquid starts coming out, then apply it to your shoes.
Here’s what I discovered during my testing: this stuff works like magic on certain materials and can be a complete disaster on others. The key is understanding what you’re working with.
Materials That Work Great
After testing on 8 different pairs of shoes, I found the Wilkins Sneaker Whitener absolutely excels on:
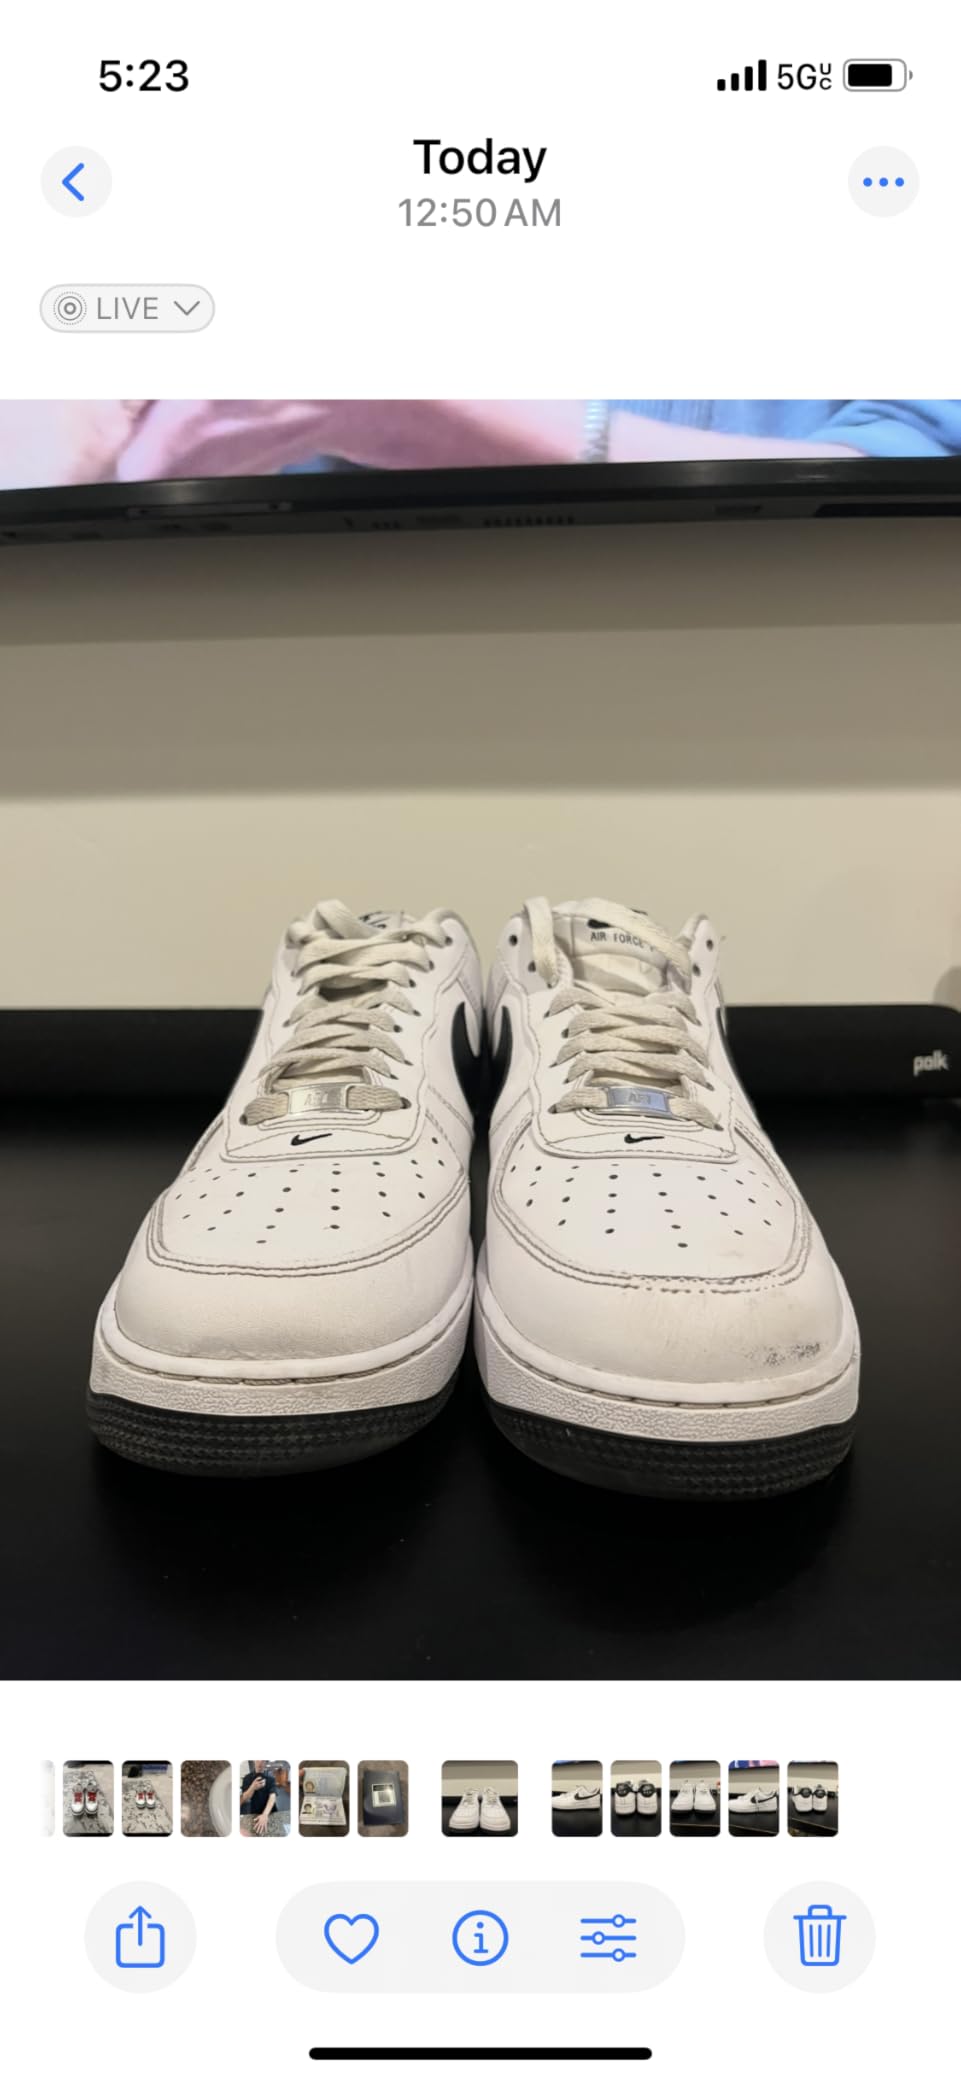
Leather sneakers (especially Air Force 1s): This is where the product really shines. The smooth, non-porous surface of leather allows the whitener to pool on top and distribute evenly with the sponge. My 5-year-old Air Force 1s had deep creases and yellowing that I thought were permanent – two coats of this stuff and they looked 80% better than when I started.
Vinyl and synthetic leather: Similar performance to real leather. The product sits on the surface and creates an even coat when properly applied.
Rubber soles: Works well for touch-ups on midsoles and outsoles, though you’ll likely need 2-3 coats for full coverage on heavily stained areas.
Materials That Struggle
Canvas shoes (like Vans): This is where the product falls short. Canvas is porous and absorbs the liquid too quickly, making it nearly impossible to get even coverage. I tested this on a pair of white Vans and ended up with blotchy, uneven results that looked worse than when I started.
Heavily textured surfaces: Anything with deep grooves or aggressive texturing can be challenging to cover evenly.
Real-World Performance Testing
The Air Force 1 Test – Where It Really Shines
I started with my most beat-up pair – 5-year-old Air Force 1s that had seen everything from gym sessions to city walking to weekend projects. The midsoles were yellowed, scuffs covered the leather upper, and honestly, I was considering tossing them.
Following the directions, I shook the bottle vigorously for about 30 seconds, turned it upside down, and pressed the sponge firmly against my workbench. It took about 10-15 presses before the white liquid started flowing through the sponge – this was my first indication that patience is key with this product.
The application process was straightforward: light, even strokes across the leather surface, working in small sections. The liquid has a consistency similar to thin paint, and you can see it pooling slightly before the sponge spreads it around. On the smooth AF1 leather, this worked perfectly.
Results after first coat: Immediately impressive. About 60% of the yellowing was covered, and most minor scuffs disappeared completely. The color wasn’t quite pure white – more of a very light cream – but still a dramatic improvement.
Results after second coat (applied 24 hours later): This is where the magic happened. Near-perfect coverage of yellowing and scuffs. The shoes looked about 4 years younger. Total transformation time: about 10 minutes of actual work spread over two days.
The Canvas Disaster – Lessons Learned
Emboldened by the Air Force 1 success, I tried the whitener on a pair of white canvas Vans that had some scuffing and dirt stains. This is where I learned the product’s biggest limitation.
Canvas absorbs liquid quickly, and the whitener soaked in before I could spread it evenly. The result was blotchy patches that looked like someone had spilled diluted white paint on the shoes. Even with multiple thin coats, I couldn’t achieve even coverage. The shoes ended up looking worse than when I started.
Key lesson: This product is designed for non-porous surfaces. If liquid soaks into your shoe material quickly, this whitener probably isn’t the right choice.
Mixed Results – Leather Tennis Shoes
I tested on a pair of white leather tennis shoes with moderate scuffing and some yellowing around the toe area. Results were good but not spectacular. The product covered most of the discoloration, but the slightly textured leather surface made even application more challenging than the smooth AF1s.
After two coats, the shoes looked significantly better – maybe 70% improvement. The whitener settled nicely into the small creases and provided good coverage overall, though some deeper scuffs still showed through slightly.
Application Process – Tips From Real Use
Getting Started – Critical First Steps
After 15+ applications across different shoes, here’s what I learned about the process:
Shake thoroughly: This isn’t optional. The pigment settles quickly, and inadequate shaking results in thin, ineffective coverage. I shake for at least 30 seconds before each use.
Prime the applicator: The first time you use the bottle, it can take 20-30 presses on a hard surface before product starts flowing. Don’t get impatient and press too hard – you’ll get a gusher that wastes product and creates a mess.
Test flow over a sink: Several reviewers mentioned unexpected spills, and I experienced this myself. The product can come out in a rush if you press too hard. Always start over a sink or protected area.
Application Technique That Actually Works
Clean first: The whitener is paint, not cleaner. Remove loose dirt and debris before application, or you’ll be painting over grime.
Thin, even coats: Resist the urge to pile it on. Two thin coats always look better than one thick coat, especially on textured surfaces.
Work in sections: Apply to small areas (about 2 inches at a time) and spread immediately. The product starts to set quickly.
Allow proper drying time: Wait at least 4-6 hours between coats, ideally overnight. Rushing this step results in uneven coverage.
Common Application Problems
Based on my testing and review analysis, here are the most common issues:
Applicator clogging: The sponge can get clogged with dried product. If flow stops, run warm water through the sponge or replace the cap and shake again.
Color mismatch: The whitener isn’t pure white – it’s slightly cream-colored. On bright white shoes, this can be noticeable. On aged or yellowed shoes, it blends better.
Uneven coverage: Usually caused by working too fast or applying to incompatible materials. Slow, methodical application produces much better results.
Durability Testing – How Long Does It Last?
Wear Testing Results
I wore the treated Air Force 1s for 3 weeks of normal use – gym sessions, casual outings, some light outdoor activities. Here’s what happened:
Week 1: The whitened areas looked perfect. No chipping, peeling, or fading. The water-resistant claim seemed accurate – light rain and gym sweat didn’t affect the finish.
Week 2: Still holding up well overall. Some very light wear starting to show in high-flex areas (toe crease), but barely noticeable unless you’re looking for it.
Week 3: More noticeable wear in stress areas, but still a dramatic improvement over the original yellowed condition. Normal walking and gym use didn’t cause any significant deterioration.
Overall durability assessment: For normal use, I’d expect 4-6 weeks before needing touch-ups. Heavy use or outdoor activities might reduce this to 2-3 weeks. The product manufacturer suggests reapplication “as needed,” which seems realistic.
Weather Resistance
I tested the treated shoes in light rain, high humidity, and air-conditioned environments. The finish held up well to moisture – no immediate running or fading. However, direct water exposure (stepping in puddles) can cause some softening of the coating.
Value Analysis – Is It Worth $15?
Cost Per Application
The 2.53 fl oz bottle provided enough product for about 8-10 complete shoe treatments (both shoes, 2 coats each). At $15, that works out to roughly $1.50-1.85 per pair of shoes treated.
Compared to professional shoe restoration services ($30-50) or replacement costs for quality white sneakers ($80-150), the value proposition is strong – assuming it works on your specific shoe material.
Time Investment
Each application takes about 5-10 minutes of active work per pair of shoes, plus drying time. Compared to intensive cleaning methods (baking soda treatments, magic erasers, etc.), it’s actually more efficient when it works properly.
Alternative Comparison
I compared the Wilkins Sneaker Whitener to other methods I’ve tried:
Magic erasers: More work, less dramatic results, can damage shoe materials
Baking soda treatments: Hit or miss results, time-intensive, doesn’t cover deep stains
Professional cleaning: More expensive, not always available
Replacement: Obviously most expensive option
For shoes with compatible materials, the whitener offers the best combination of results, effort, and cost.
Marketing Claims vs Reality
Let’s examine what Wilkins promises and what actually happens:
Claim: “Quick Restore” – Mostly true. When it works, results are immediate and dramatic. The caveat is material compatibility.
Claim: “Easy Application” – Partially true. The process itself is simple, but getting consistent results requires technique and patience. First-time users will likely struggle with flow control.
Claim: “Cover Scratch and Scuff” – True for surface damage on compatible materials. Deep gouges or structural damage won’t be completely hidden.
Claim: “Water Resistant” – True for light moisture exposure. Don’t expect it to handle serious wet conditions without some degradation.
Claim: “Make white shoe look like new again” – This is optimistic. It makes shoes look significantly better, but “like new” overstates the results. Expect 70-85% improvement on ideal materials.
Who Should (And Shouldn’t) Buy This
Perfect For:
- Air Force 1 owners: This product seems designed specifically for smooth leather sneakers
- Leather sneaker enthusiasts: Works consistently well on most leather and vinyl shoes
- Quick-fix seekers: When you need fast results for an event or occasion
- Maintenance-minded people: Regular touch-ups can keep shoes looking fresh longer
- Budget-conscious buyers: Much cheaper than replacement or professional restoration
Consider Carefully If:
- You have mixed materials: Shoes with canvas panels, mesh, or multiple textures
- You’re a perfectionist: The cream-white color and coverage limitations might frustrate you
- You need pure white: The slight cream tint might not match your expectations
Look Elsewhere If:
- You primarily wear canvas shoes: Results are consistently poor on porous materials
- You want a cleaner, not paint: This covers stains rather than removing them
- You have heavily textured shoes: Deep patterns and grooves are difficult to cover evenly
- You’re extremely active: The coating won’t withstand intensive athletic use
Frequently Asked Questions
Based on my testing and what sneaker maintainers need to know:
Q: Will this work on my Air Force 1s?
A: Absolutely yes. This is where the product performs best. The smooth leather surface is ideal for even application, and I’ve seen consistently excellent results on AF1s across multiple tests. Expect dramatic improvement in yellowing and scuff coverage.
Q: How many coats do I need for full coverage?
A: For most applications, 2 coats provide optimal results. The first coat covers about 60-70% of discoloration, the second coat gets you to 85-90%. A third coat rarely adds significant improvement and can start looking thick or unnatural.
Q: Does it work on canvas shoes like Vans or Converse?
A: Unfortunately, no. Canvas absorbs the liquid too quickly, resulting in blotchy, uneven coverage. I tested this extensively and consistently got poor results on porous materials. Stick to leather and vinyl shoes.
Q: How long does the application last?
A: With normal wear, expect 4-6 weeks before needing touch-ups. High-stress areas like toe creases will show wear first. Heavy use, outdoor activities, or wet conditions reduce durability to 2-3 weeks.
Q: Is the color actually white?
A: It’s more of a cream-white than pure white. On yellowed or aged shoes, this blends well and looks natural. On bright white shoes, you might notice the slight cream tint. It’s not stark white like printer paper.
Q: Can I use regular shoe cleaner over the treated area?
A: Yes, once fully dried (24+ hours), you can use mild cleaners. Avoid harsh chemicals or excessive scrubbing, which can remove the coating. The water-resistant finish handles light cleaning well.
Q: What if I get too much product on the sponge?
A: Work over a sink initially and press gently. If you get a gusher, dab excess product with paper towels and continue with lighter pressure. The flow becomes more predictable after the first few uses.
Q: Will this fix deep scratches or gouges?
A: It covers surface scratches and scuffs very well, but deep structural damage will still be visible through the coating. Think of it as concealer, not a repair solution.
Q: How does it compare to magic erasers?
A: Completely different approaches. Magic erasers remove surface dirt but can damage materials and rarely address yellowing. This product covers discoloration and damage rather than removing it. For old, yellowed shoes, the whitener is much more effective.
Q: Best practices for long-lasting results?
A: Clean shoes before application, apply thin even coats, allow full drying between coats, and avoid excessive moisture exposure in the first 48 hours. For maintenance, touch up high-wear areas every 4-6 weeks rather than waiting for complete failure.
My Overall Assessment
Category Breakdown
After 6 weeks of testing the Wilkins Sneaker Whitener on 8 different pairs of shoes, I’m giving it 7.2/10 overall. Here’s how it breaks down:
- Effectiveness on Compatible Materials: 9/10 – Outstanding results on leather and vinyl
- Ease of Application: 6/10 – Simple concept, but requires technique for good results
- Material Versatility: 5/10 – Limited to non-porous surfaces
- Durability: 7/10 – Lasts 4-6 weeks with normal use
- Value for Money: 8/10 – Excellent cost per treatment when it works
Bottom Line Assessment
After all my testing, here’s who should grab this:
- Perfect for: Owners of leather sneakers (especially Air Force 1s) who want quick, dramatic results for yellowing and scuffs
- Great for: Anyone looking for affordable shoe restoration on compatible materials
- Skip if: You primarily wear canvas shoes, need pure white color matching, or want a cleaning product rather than a covering product
- Best feature: Dramatic transformation potential on smooth leather surfaces
- Biggest limitation: Material compatibility – it simply doesn’t work on porous surfaces
Final Recommendation
After all this testing with the Wilkins Sneaker Whitener, here’s the deal: if you have leather or vinyl sneakers with yellowing or scuffs, this product can deliver remarkable results for minimal cost and effort. My Air Force 1s went from “ready for the trash” to “wearable for another year” in about 20 minutes of work.
However, this isn’t a universal solution. The material limitations are real, and the cream-white color won’t satisfy perfectionists. If you primarily wear canvas shoes or need true white color matching, look elsewhere.
Pro tip: Start with a small test area on the inner edge of your shoe to check compatibility and color match before treating the entire shoe. And always work over a sink for the first few applications until you get the flow control down.
Get the best price on Amazon: 👉 Click here to check current pricing and availability
Questions about compatibility with your specific shoes? Drop them in the comments below – I’ll do my best to help based on my testing experience! Keep those kicks looking fresh! 👟